Optimizing Web Delivery: A Step-by-Step Tutorial on Setting Up Apache Reverse Proxy for Linux


Reverse Proxy : A reverse proxy is a server that sits in front of one or more web servers, intercepting requests from clients. It receives all requests from clients across the internet and forwards them to the web servers behind them and ensures that no client ever communicates directly with that origin server. The clients can only see the public IP of the proxy server.

Benefits of a Reverse Proxy :
Load Balancing: Distributes incoming traffic across multiple servers to prevent overload on a single server, ensuring optimal resource utilization and improved performance.
Security: With a reverse proxy in place, a web site or service never needs to reveal the IP address of their origin server(s). This makes it much harder for attackers to leverage a targeted attack against them, such as a DDoS attack.
SSL Termination: Handles SSL/TLS encryption and decryption, offloading this resource-intensive process from backend servers and simplifying SSL certificate management.
Content Compression: Compresses and caches content, reducing bandwidth usage and accelerating content delivery to end-users.
Caching: Stores frequently requested content, reducing the load on backend servers and improving response times for users.
Application Firewall: Provides an additional layer of security with features like web application firewalls (WAFs) to filter and block malicious traffic.
Centralized Authentication and Authorization: Handles authentication processes, consolidating user access control and reducing the burden on backend services.
URL Rewriting: Modifies URLs to improve user experience, enhance SEO, and simplify resource location.
Scalability: Facilitates easy scaling of web applications by adding or removing backend servers without impacting users.
Logging and Monitoring: Centralizes logging and monitoring, simplifying the tracking of user activities, error detection, and performance analysis.
The most popular open source software used to configure a server as a reverse proxy is the Apache HTTP Server.
In this article , I am going walk you through the process of setting up and configuring a reverse proxy on an Apache server. I am going to perform below steps and explain reverse proxy concepts.
Step 1 : I will launch an EC2 Instance (WebServer-EC2) in Private Subnet and will not assign any public IP .
Step 2: I will install Apache webserver in EC2 instance using userdata and host a static website on same web server. As this EC2 instance is in private subnet , end-user will not able to access the site means it will be not exposed to internet directly .
Step 3: I will launch another EC2 (ProxyServer-EC2) and install the Apache and configure as Proxy server.
Step 4: Test Configuration -Verify if reverse proxy server able to access web server.
Step 5: Create Application Load balancer and access the Reverse proxy server using ALB DNS.
Step 6: Verify if Application load balancer able to access web server static page via Reverse proxy Server.
Implementations steps :
Step 1: Launch the WebServer-EC2 instance in private subnet.

Step 2 : User Data Script :
#!/bin/bash
# Use this for your user data (script from top to bottom)
# install httpd (Linux 2 version)
yum update -y
yum install -y httpd
systemctl start httpd
systemctl enable httpd
echo "<h1>Hello World from Alok on $(date)</h1>" > /var/www/html/index.html
As you can see ,there is no public IP associated with ec2 instance and instance is in private subnet.


Web server is up and running

Paste the Private-Ip address of WebServer in browser and verify if static page displayed

Web server setup completed. Now lets move on for Proxy server setup.
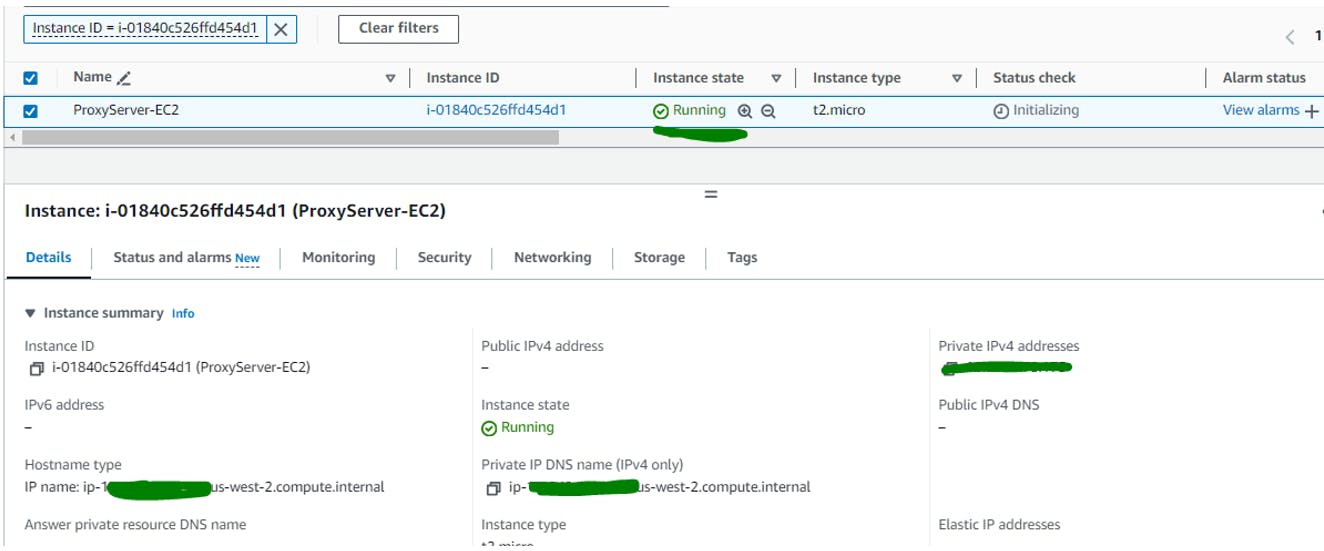
Step 3: Launch another EC2 (ProxyServer-EC2) and install the Apache and configure as Proxy server.
EC2 Instance is up and running
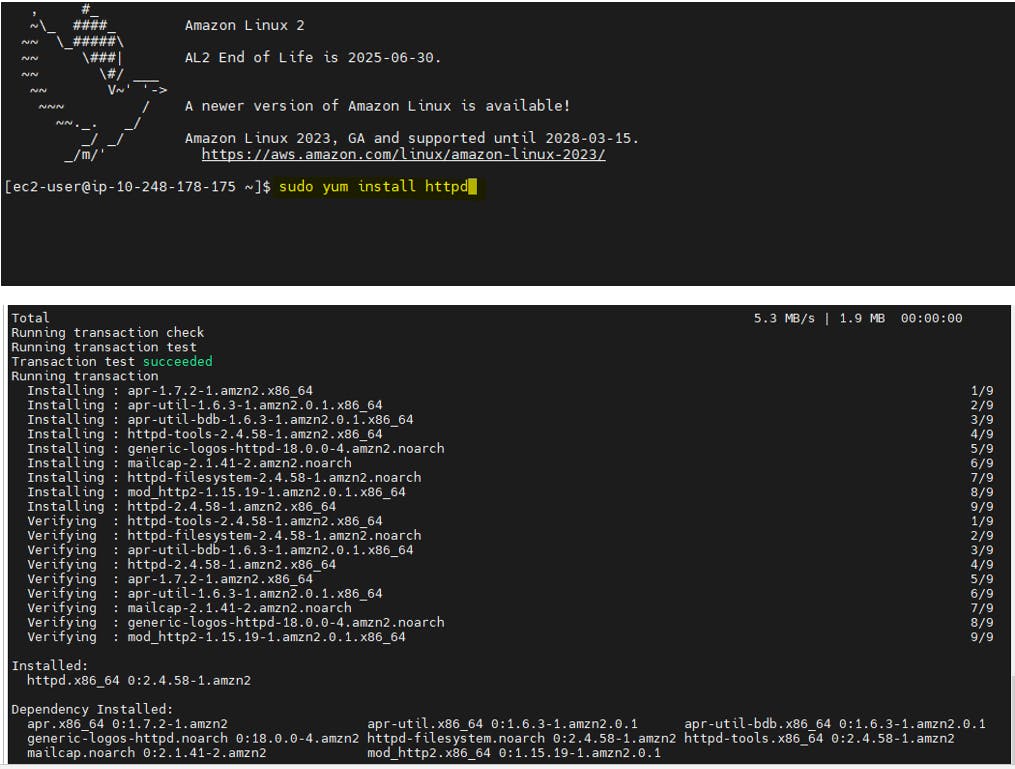
Install Apache web server, run the following command:
sudo yum install httpd
Now run the following command to check whether Apache HTTP server is running or not:
sudo systemctl status httpd
As you can see from the screenshot below, the Apache HTTP server is not running.

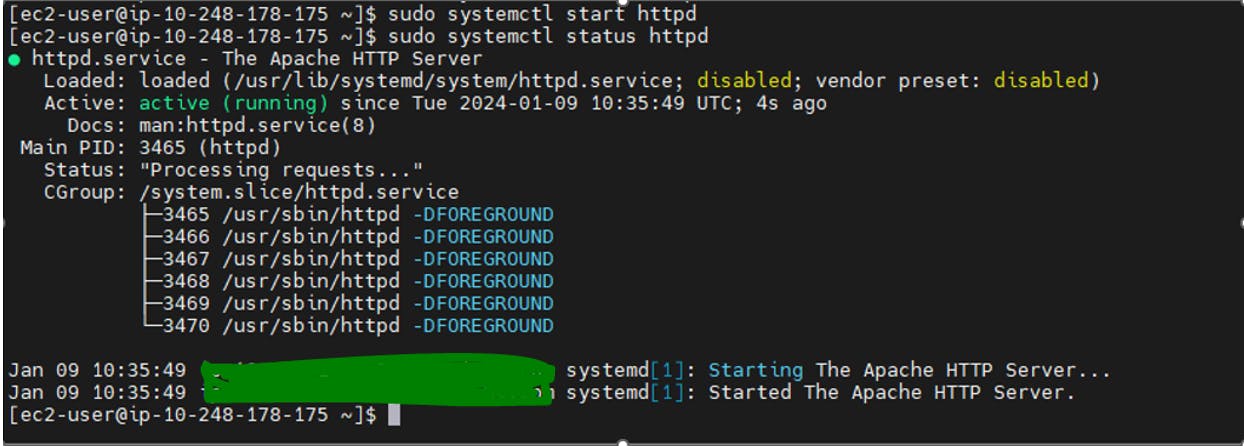
Command to start Apache
sudo systemctl start httpd
You will want the Apache HTTP server to start automatically on system boot
sudo systemctl enable httpd

Now let’s check and list open ports
sudo netstat -tulpn | grep LISTEN
Where,
-t : All TCP ports
-u : All UDP ports
-l : Display listening server sockets
-p : Show the PID and name of the program to which each socket belongs
-n : Don’t resolve names |
grep LISTEN : Only display open ports by applying grep command filter.

sudo netstat -ntlp|grep httpd

Apache is running on port 80
check Apache for any configuration error with the following command
httpd -t
If everything is fine, you should get the following output:
Syntax OK

Install mod_ssl for Apache Server.
mod_ssl : Provides strong cryptography for the Apache Web server via the Secure Sockets Layer (SSL) and Transport Layer Security (TLS) protocols.


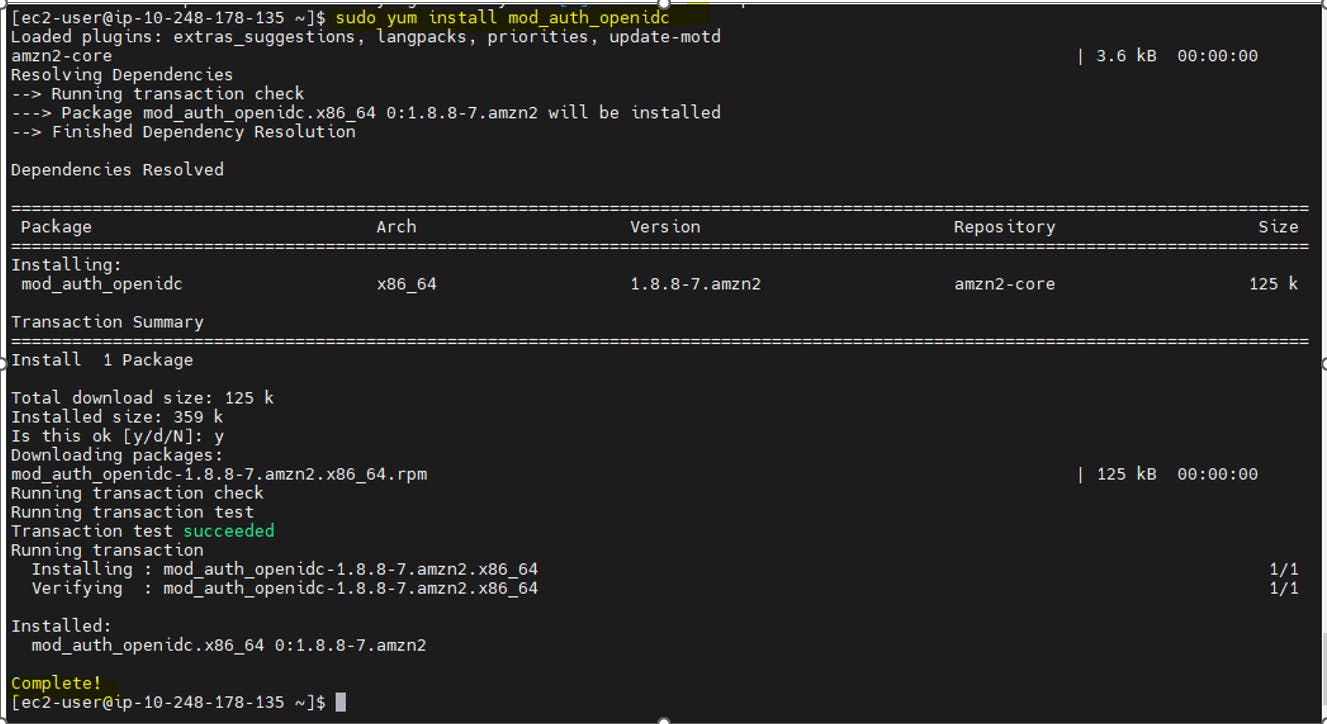
Install mod_auth_openidc
mod_auth_openidc : is an OpenID certified, open source and commercially supported authentication/authorization module for the Apache 2.x HTTP server that authenticates users against an OpenID Connect Provider.
sudo yum install mod_auth_openidc
Virtual Host file : Virtual host files are the files that specify the actual configuration of our virtual hosts and dictate how the Apache web server will respond to various domain requests.
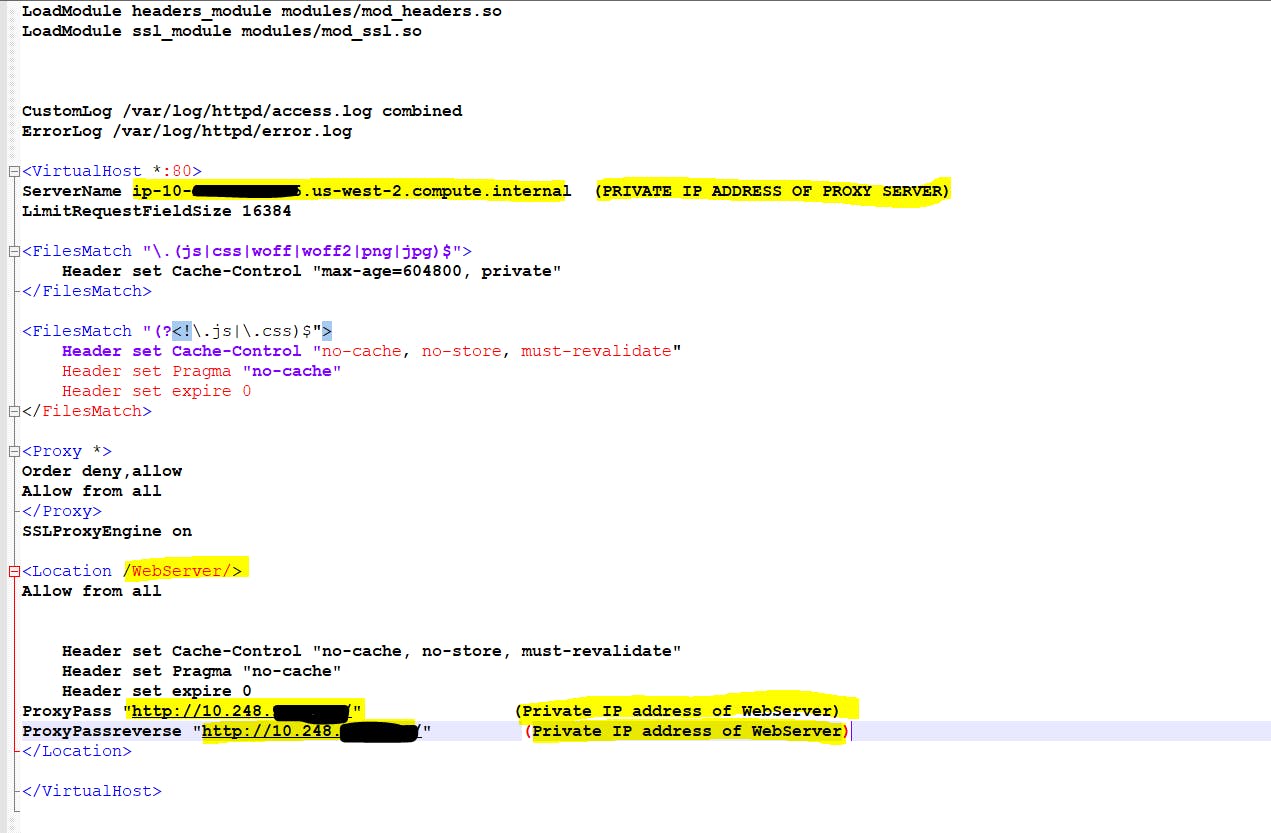
Configure a vhost file at location at: /etc/httpd/conf.d/vhost.conf
LoadModule headers_module modules/mod_headers.so
LoadModule ssl_module modules/mod_ssl.so

CustomLog /var/log/httpd/access.log combined
ErrorLog /var/log/httpd/error.log

<VirtualHost *:80>
ServerName <Private IP address of proxy server>
LimitRequestFieldSize 16384

<FilesMatch "\.(js|css|woff|woff2|png|jpg)$">
    Header set Cache-Control "max-age=604800, private"
</FilesMatch>

<FilesMatch "(?<!\.js|\.css)$">
    Header set Cache-Control "no-cache, no-store, must-revalidate"
    Header set Pragma "no-cache"
    Header set expire 0
</FilesMatch>

<Proxy *>
Order deny,allow
Allow from all
</Proxy>
SSLProxyEngine on

<Location /WebServer/>  --You can put any name which you will use to access webserver in URL
Allow from all


    Header set Cache-Control "no-cache, no-store, must-revalidate"
    Header set Pragma "no-cache"
    Header set expire 0
ProxyPass "http://IP/"       ---------Private IP of Webserver or origin server
ProxyPassreverse "http://IP/" ---------Private IP of Webserver or origin server
</Location>

</VirtualHost>
ProxyPass and ProxyPassReverse : are directives in Apache that handle the passing of requests from the client to the backend server and the response from the backend server to the client, respectively. They are crucial in a reverse proxy setup to ensure proper routing of requests and responses.

Restart Apache Server
sudo service httpd restart

Step 4: Test Configuration
To test the configuration, browse the URL http://IPAddressofproxyserver/WebServer/. If the configuration is correct, you should be able to access the site without any issues.

Step 5: Create Application Load balancer and access the Reverse proxy server using ALB DNS.
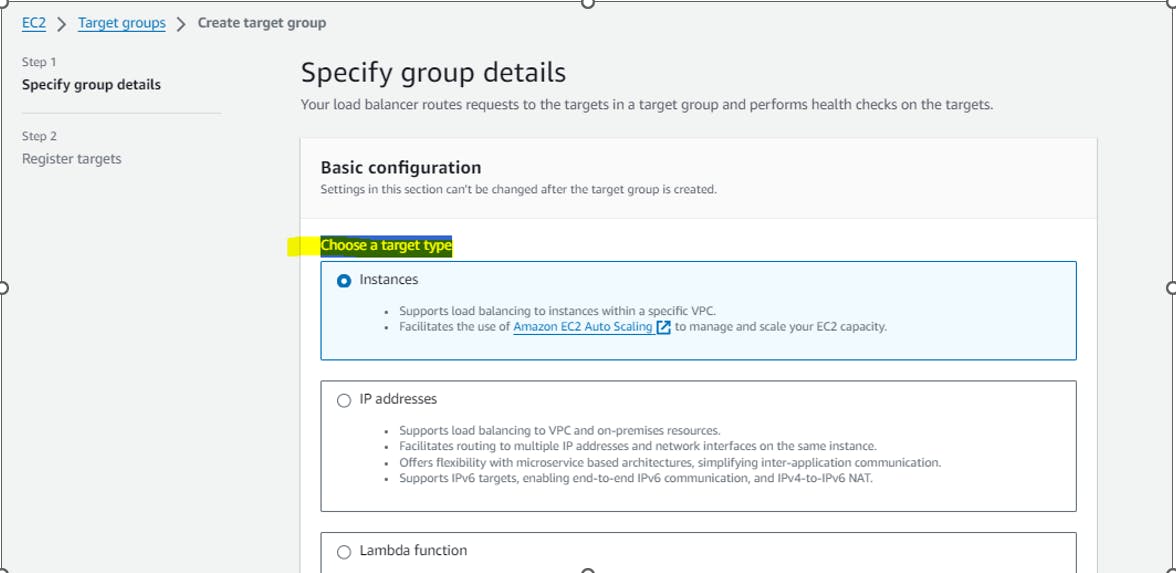
First Create Target Group for reverse proxy server:

Choose a target type as Instances


Register targets


Now Create ALB


ALB is active now
Step 6: Verify if Application load balancer able to access web server static page via Reverse proxy Server.

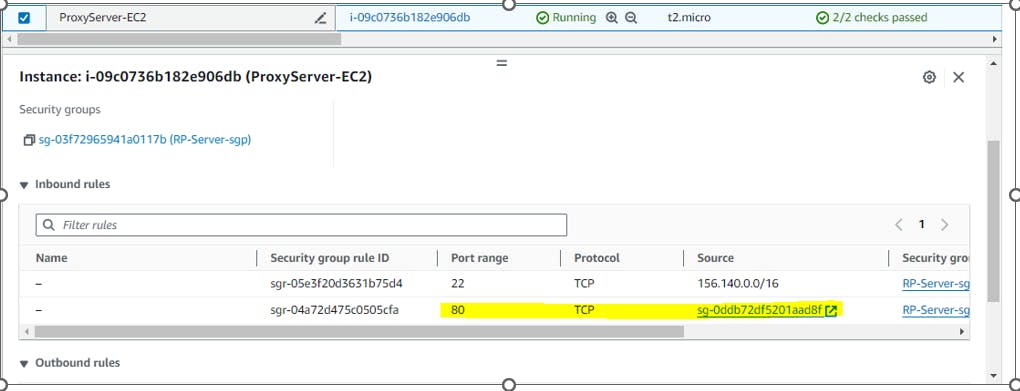
As a best practice modify the reverse proxy server security group to receive inbound traffic that is coming from the Load Balancer.
Reverse proxy server instance to accept traffic from only from Load Balancer, then In RP-Server-sgp, permit inbound traffic on the desired port(in this case 80) from Load balancer security group.
Result: Reverse Proxy server instance associated with RP-Server-sgp will permit inbound traffic that is coming from the Load Balancer.
ALB security Group (sg-0ddb72df5201aad8f)
Verify when browser hit the url then client see only ALB DNS or Proxy Server IP address.

Conclusion : In this article I have explained what is a reverse proxy and how it is used. I have also explained step by step process to configure reverse proxy and showed how reverse proxy sits in front of an origin server and ensures that no client ever communicates directly with that origin server.