Simplifying Two-Tier App Deployment Using Docker Containers

Dedicated and highly skilled AWS DevOps and Linux professional with over 10+ years of experience in designing, implementing, and maintaining cloud infrastructure and CICD pipelines. Proficient in optimizing processes, automating workflows, and ensuring the reliability and scalability of cloud-based systems. Demonstrated expertise in Kubernetes and containerization technologies. Proven ability to understand and execute the complete deployment lifecycle. Proven expertise in real-time troubleshooting and leading cross functional teams to success.
In this blog, we will deploy a 2-tier Flask application using Docker containers. This setup will consist of a frontend and Database tier, each running in separate containers.
Prerequisites :
Here are some prerequisites for this project are given below:
1: AWS EC2
2: Git & GitHub
3: Docker
4: DockerHub
5: Docker compose
Docker : Docker is a popular platform used for containerization, which allows developers to package and distribute applications and their dependencies as lightweight containers. These containers can then be deployed consistently across different environments, such as development, testing, and production, without worrying about differences in underlying infrastructure.
Here are some key components and concepts related to Docker:
Containers: Docker containers are lightweight, standalone, and executable packages that contain everything needed to run an application, including the code, runtime, libraries, and dependencies. Containers isolate applications from each other and from the underlying host system, providing consistency and portability.
Images: Docker images are read-only templates used to create containers. An image contains the filesystem and configuration needed to run an application. Images are built from a Dockerfile, which specifies the instructions to assemble the image layer by layer.
Docker Engine: Docker Engine is the core component of Docker that enables containerization. It includes a daemon process called dockerd, which manages Docker objects such as images, containers, networks, and volumes, and a CLI (Command-Line Interface) called docker, which allows users to interact with Docker.
Docker Hub: Docker Hub is a cloud-based registry service provided by Docker, where users can store and share Docker images publicly or privately. It hosts a vast collection of pre-built images for popular software applications and development environments, making it easy to get started with Docker.
Docker Compose: Docker Compose is a tool for defining and running multi-container Docker applications. It uses a YAML file to define the services, networks, and volumes required for an application, allowing developers to manage complex multi-container setups with a single command.
Step 1 :Create an Ec2 instance
In this project we are using Amazon linux2 (t2.micro) instance.

Step 2: Docker Installation, configuration and troubleshooting.
First, ssh to instance and install docker
sudo yum update -y
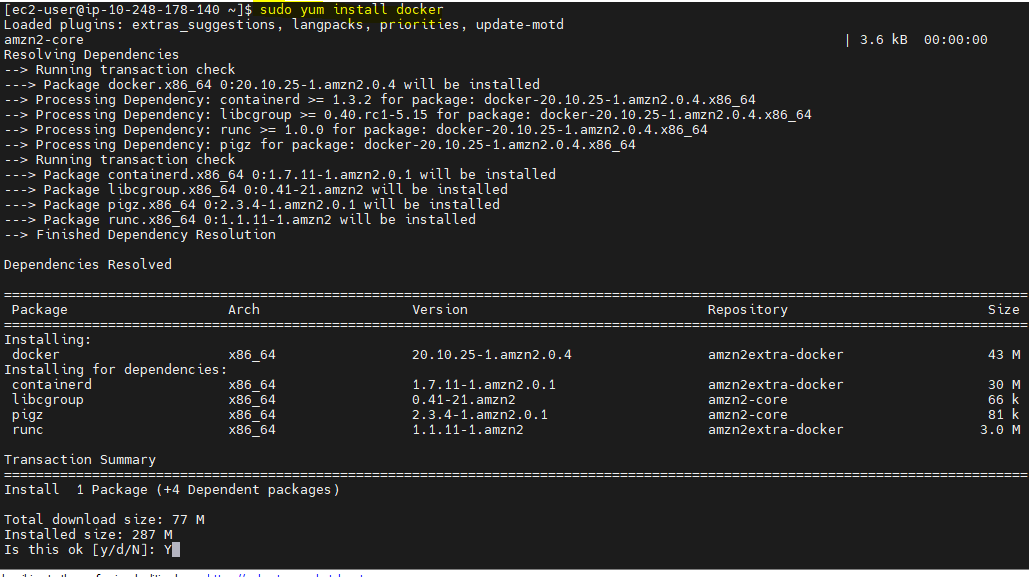
sudo yum install docker -y
Lets verify docker version. If you want to see an extended version of the version details, such as the API version, Go version, and Engine Version, use the version command without dashes.
docker –-version
docker version

Now start Docker service using below command
sudo service docker start
You can also use the following system control command
sudo systemctl start docker
Verify if the Docker is actually up and running.
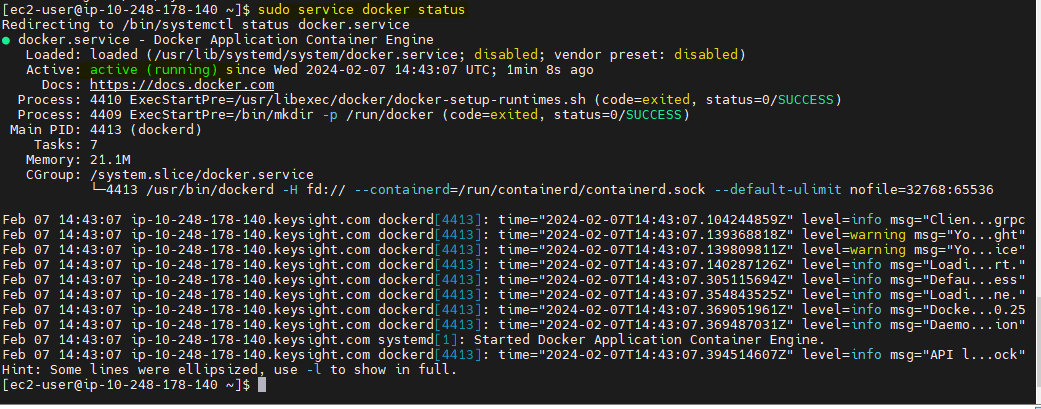
sudo service docker status
Enable docker service at AMI boot time using below command
sudo systemctl enable docker.service
Verify if we are able to run any docker commands like "docker ps"
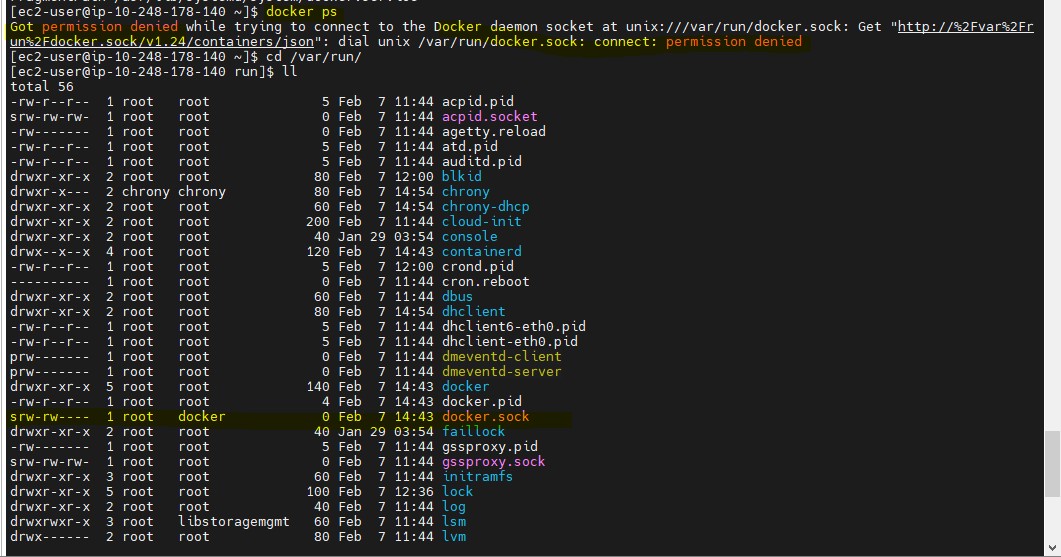
By default Docker works with the root user and other users can only access to Docker with sudo commands. However, we can bypass the sudo commands by creating a new group with the name docker and add ec2_user.
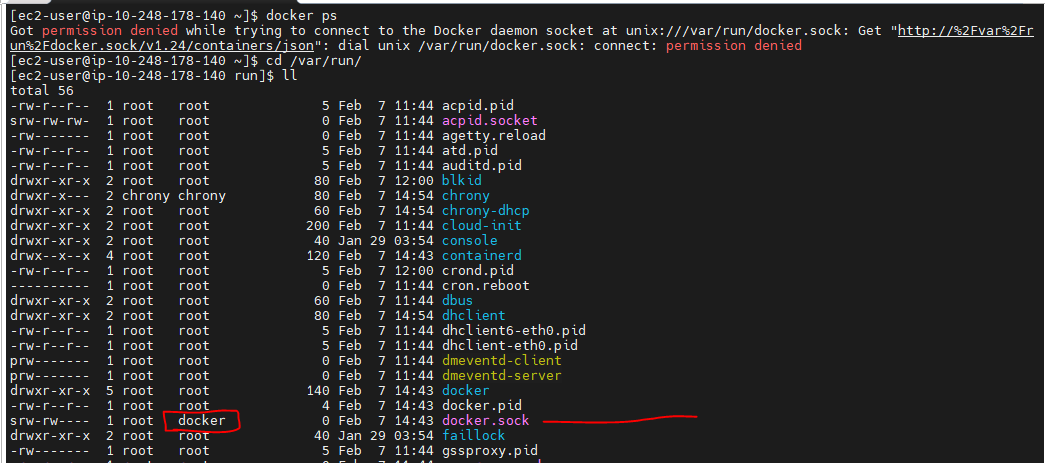
But for mycase you can see Docker daemon socket (docker.sock) is already in group docker.
You can create the docker group with below command.
sudo groupadd docker
So problem is ec2-user is not part of docker group , we can add ec2-user using below commands .Now let’s add ec2-user to docker group.

sudo usermod -a -G docker ec2-user
In order to enable the changes, run the following command.

newgrp docker
Now we are able to run any docker command without sudo

Step 3 : Git Installation
sudo yum install git
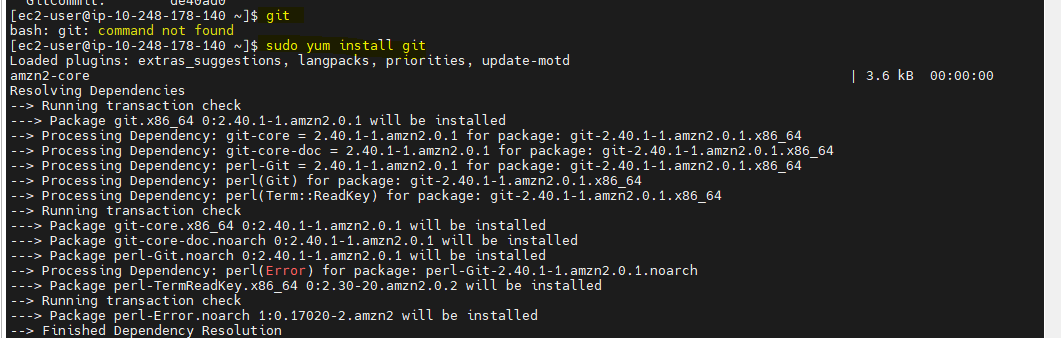
Verify git version : git version

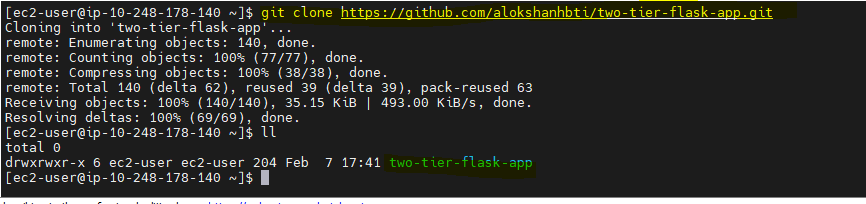
Step 4 : Clone the Repository from the git hub and docker file creation
Clone the Repository from the git hub, copy the HTTPS command
git clone https://github.com/alokshanhbti/two-tier-flask-app.git
Write a Docker file for the Python installation and Mysql Client.
    # Use an official Python runtime as the base image
    FROM python:3.9-slim

    # Set the working directory in the container
    WORKDIR /app

    # install required packages for system
    RUN apt-get update \
        && apt-get upgrade -y \
        && apt-get install -y gcc default-libmysqlclient-dev pkg-config \
        && rm -rf /var/lib/apt/lists/*

    # Copy the requirements file into the container
    COPY requirements.txt .

    # Install app dependencies
    RUN pip install mysqlclient
    RUN pip install --no-cache-dir -r requirements.txt

    # Copy the rest of the application code
    COPY . .

    # Specify the command to run your application
    CMD ["python", "app.py"]
Line by line description:
FROM python:3.9-slimFROM allows us to initialize the build over a base image. In our case, we are using a python:3.9-slim image. (python:3.9-slim is a small Linux Distribution (~ 5MB).) It is heavily used by Docker apps because of its small size. In short, we are using a Linux environment with python 3.9 for our app.
WORKDIR /appThe WORKDIR directive sets the current working directory inside the container, equivalent to running cd inside the container. (Note: RUN cd will not change the current working directory.)
RUN apt-get update \&& apt-get upgrade -y \&& apt-get install -y gcc default-libmysqlclient-dev pkg-config \&& rm -rf /var/lib/apt/lists/*RUN executes the given command inside the container and install required packages for applications.
COPY requirements.txt .COPY . .Copy everything in the current directory (our server code and configurations) into the app directory.
# Install app dependenciesRUN pip install mysqlclientRUN pip install --no-cache-dir -r requirements.txtThe RUN command executes commands needed to set up your image for your application, such as installing packages, editing files, making directory or changing file permissions.
CMD ["python", "app.py"]CMD is the command that is executed when you start a container. Here, you are using CMD to run your Python applcation. There can be only one CMD per Dockerfile. If you specify more than one CMD, then the last CMD will take effect.
Step 5 : Build the docker image from docker file.
docker build -t twotier-flaskapp .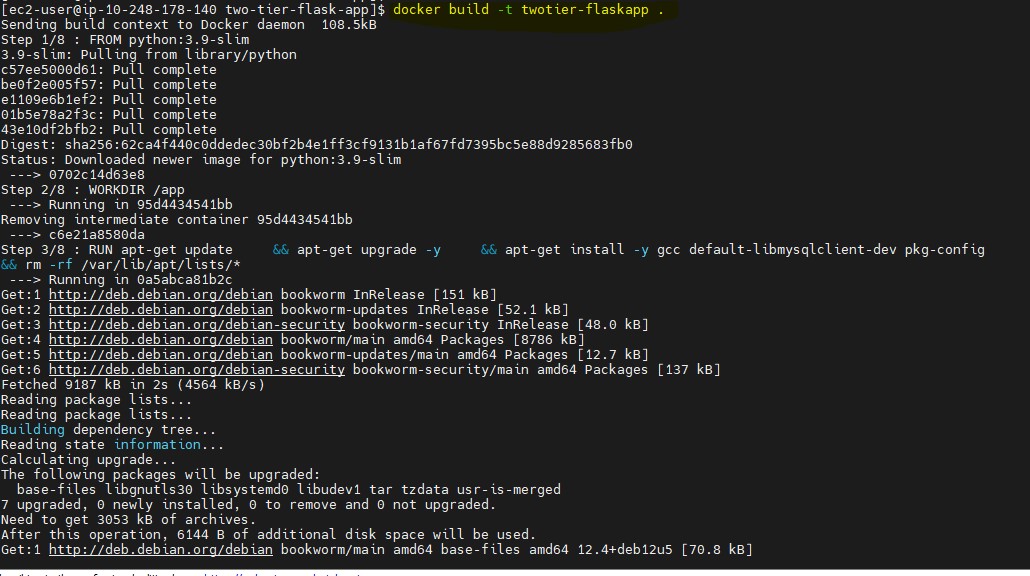
Verify that your image shows in your image list:
docker image ls
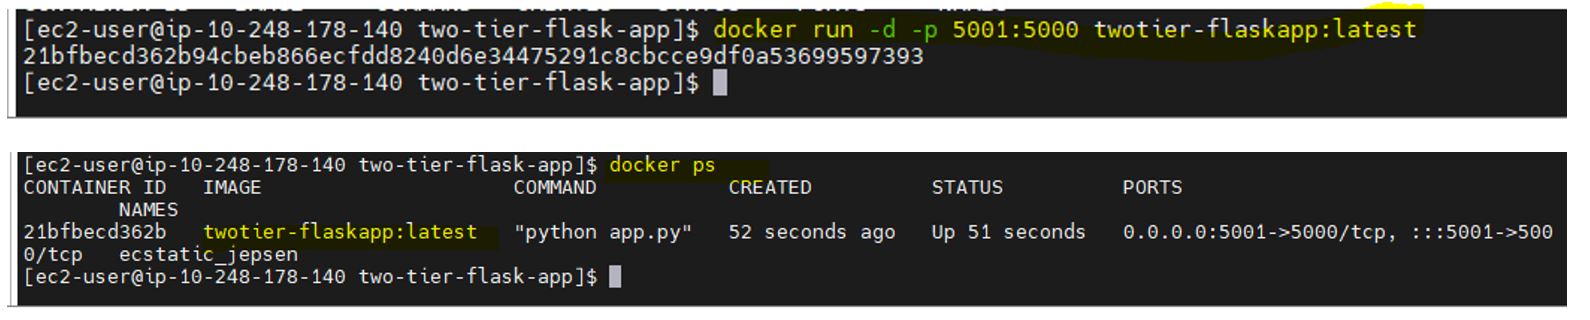
Step 6 : Run the docker container from docker images which we build
docker run -d -p 5001:5000 twotier-flaskapp:latestThe -p flag maps a port running inside the container to your host. In this case, we're mapping the Python app running on port 5000 inside the container to port 5001 on your host.
Access The application from the host machine:
Now open the Port in EC2 Security Groups for Incoming Traffic and allow port no 5001.

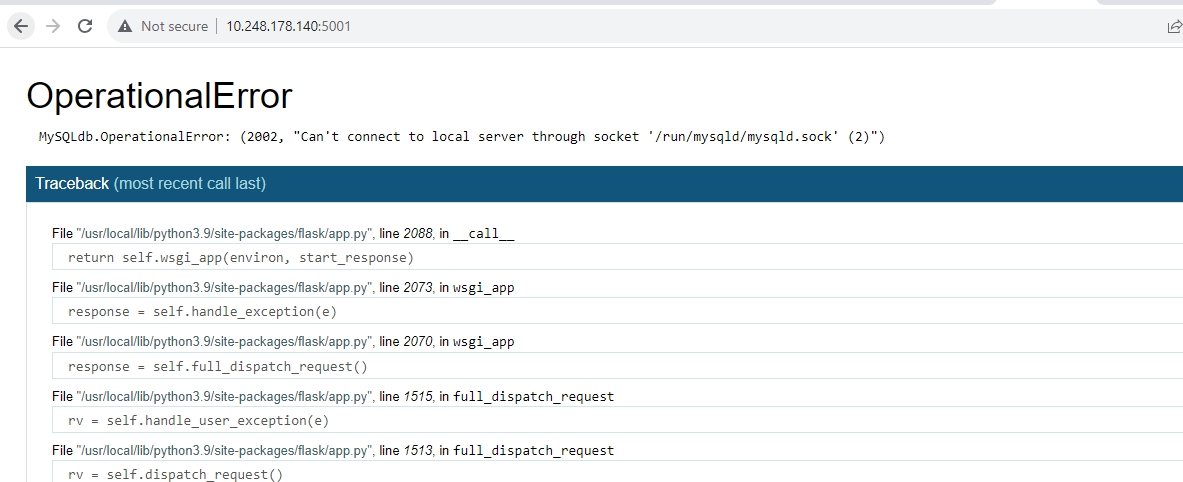
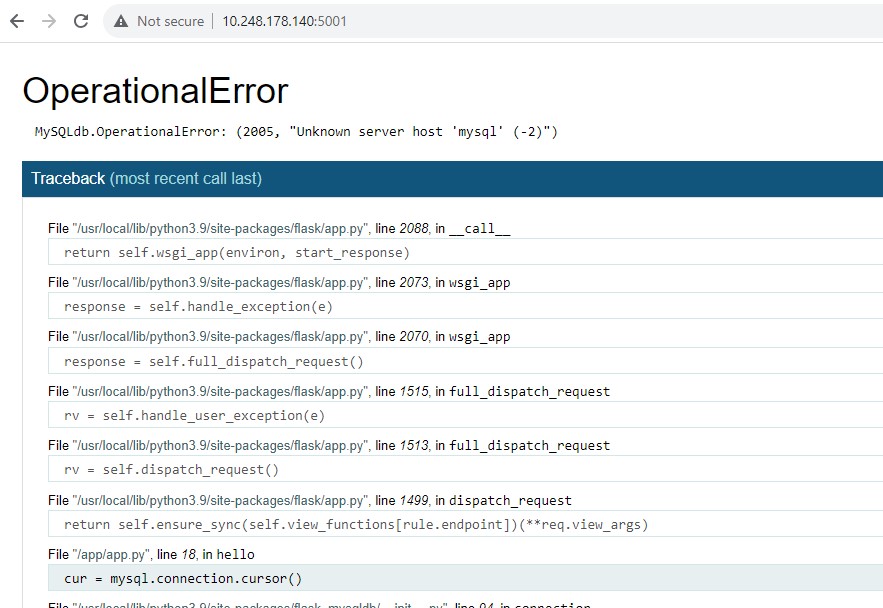
Now Access the app with the help of the Public IP/Private IP of Ec2 Instance with below syntax http://10.248.178.140:5001/
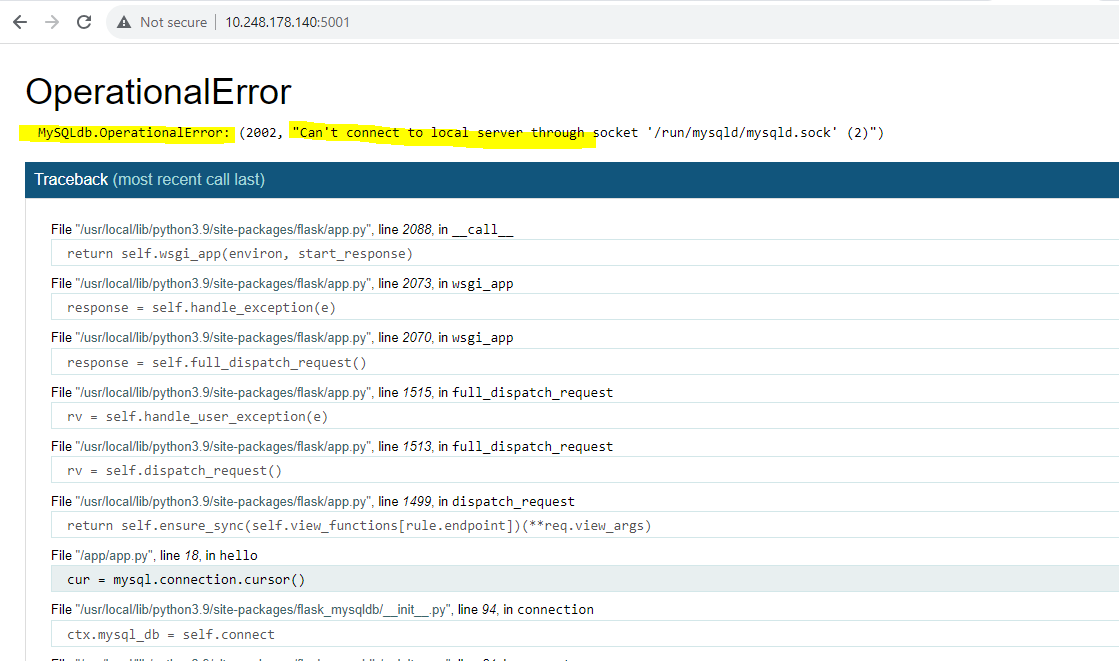
This error is due to mysql database , as per our two tier app front end is connecting to Database and database container not yet created.
docker run -d -p 3306:3306 --name mysql -e MYSQL_ROOT_PASSWORD="admin123" mysql:5.7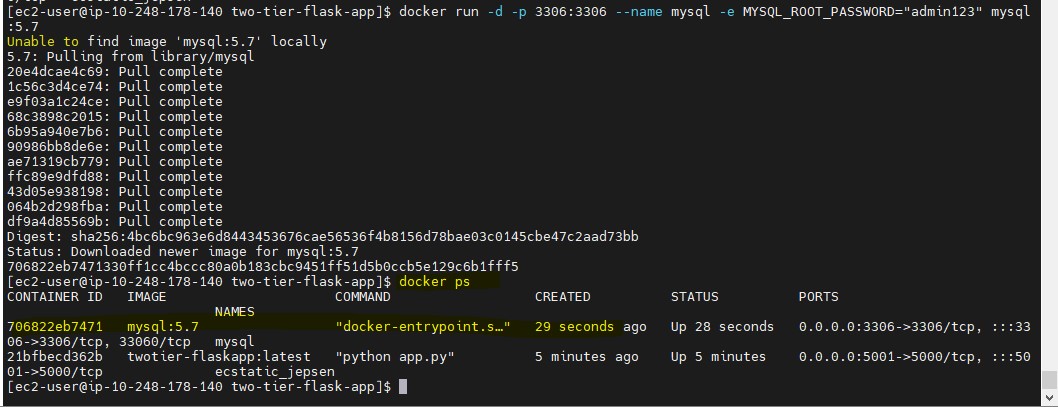
Step 7 : Troubleshoot the errors and access the application
Troubleshoot 1 : Check the log output of the container
If you want to see logs from your application, you can use the docker container logs command. By default, docker container logs prints out what is sent to standard out by your application.
    docker container ls

    #You should see your container id by running this command.

    # Then

    docker container logs [container id]
Both containers are not communicating with each other because both containers are not in the same network. To solve this problem we have to create a custom bridge network.
Troubleshoot 2 : We need to create a docker network two-tier to connect MySQL Container and MySQL Database.
    docker network create twotier-network
    docker network ls
Stop previous running containers, before creating new containers.
    docker kill <container-id-1> <container-id-2>
    docker rm <container-id-1> <container-id-2>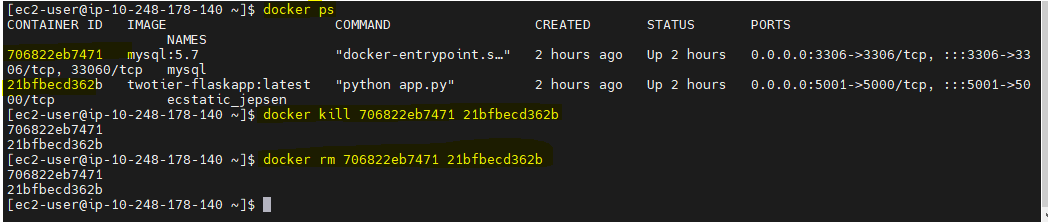
Lets create first Mysql container using below command having (-e) environment variables MYSQL_DATABASE ,MYSQL_USER, MYSQL_PASSWORD, MYSQL_ROOT_PASSWORD.
docker run -d -p 3306:3306 --network=twotier-network -e MYSQL_DATABASE=myDb -e MYSQL_USER=admin -e MYSQL_PASSWORD=admin -e MYSQL_ROOT_PASSWORD=admin mysql:5.7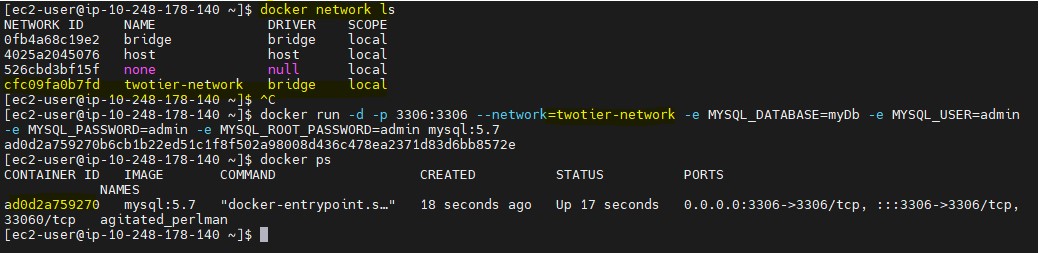
Lets create flask app container using below command having (-e) environment variables MYSQL_HOST , MYSQL_USER , MYSQL_PASSWORD ,MYSQL_DB.
docker run -d -p 5001:5000 --network=twotier-network -e MYSQL_HOST=mysql -e MYSQL_USER=admin -e MYSQL_PASSWORD=admin -e MYSQL_DB=myDb twotier-flaskapp:latestCheck the Network of Both Containers and Inspect both containers on the Network with the help of the below command.
    docker network ls
    docker network inspect twotier-network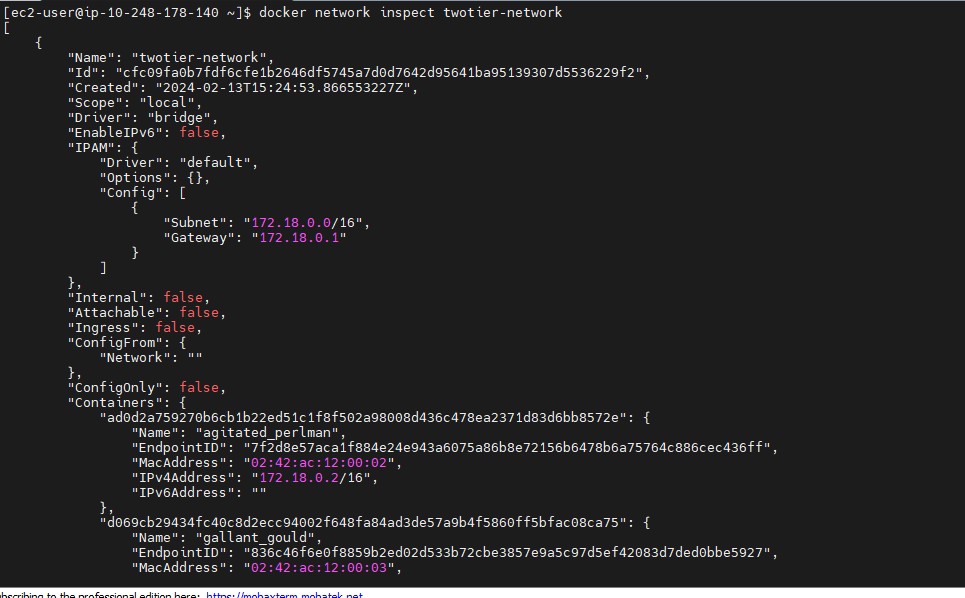
Now MySql Container and MySql Database are in same network . lets try to access the application
Troubleshoot 3 : Now my frontend flaskapp is not able to understand HOST 'mysql'. lets try to ssh to flaskapp container and telnet/ping to mysql container and verify if any connection issues.
By default flask app container will not have ping or telnet utility so i will modify the docker file and add telnet and ping utility.

Then Rebuild the image and create Docker container again using docker run commands.
Let verify mysql container ip address and flaskapp container ip address.
docker network inspect twotier-network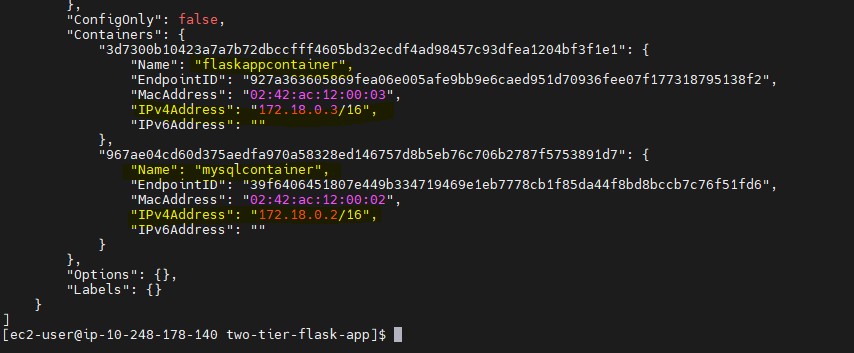
Let ssh to flaskapp container and telnet to mysql container.
    docker ps -a
    docker exec -it <container-id> bash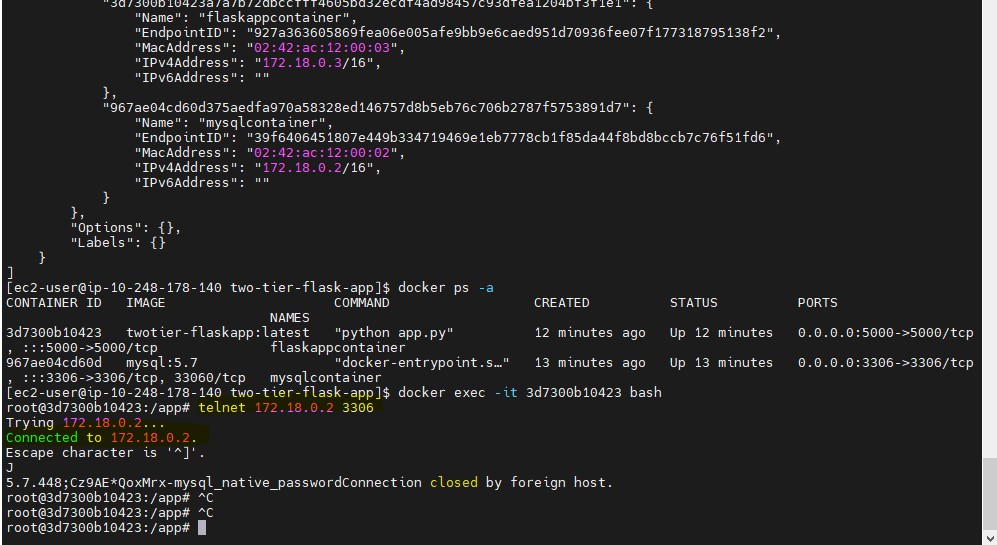
so there is no issue between container to communicate as telnet is working and connection is successful.
So i will remove old containers and try to create flaskapp container with
MYSQL_HOST=<mysql-container name or IP ADDRESS of mysql Container>
docker run -d -p 5001:5000 --network=twotier-network -e MYSQL_HOST=172.18.0.2 -e MYSQL_USER=admin -e MYSQL_PASSWORD=admin -e MYSQL_DB=myDb --name=flaskappcontainer twotier-flaskapp:latestOnce container is up and running and try to access the application. MySql Host error gone and front-end is connected to database tier.

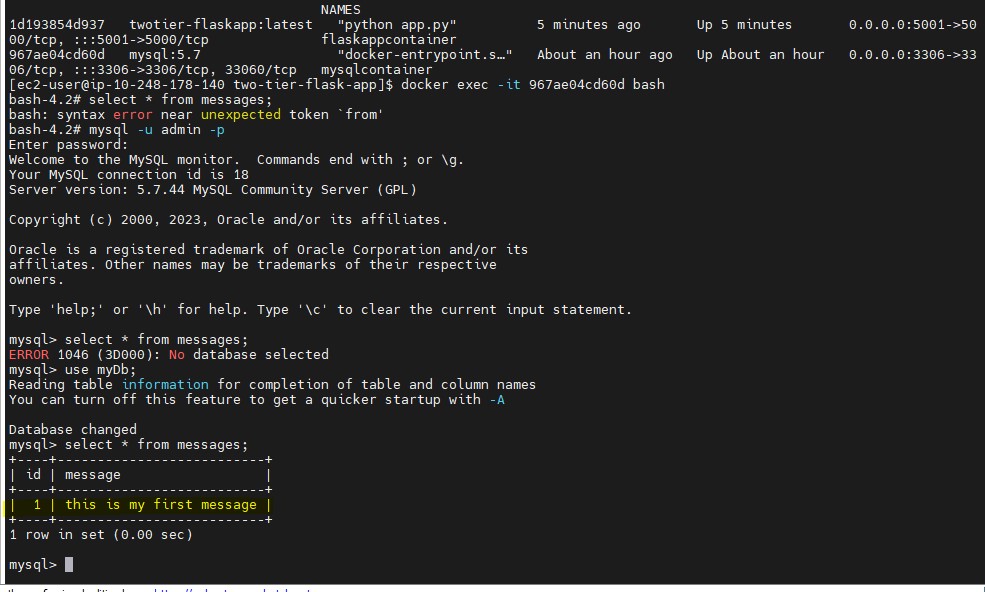
Troubleshoot 4: Lets create table in database.We can exec in Mysql container and then try to login the database using mysql user and password.
    sudo docker exec -it <container-id> bash
    docker exec -it 967ae04cd60d bash
    sudo mysql -u admin -p
    enter password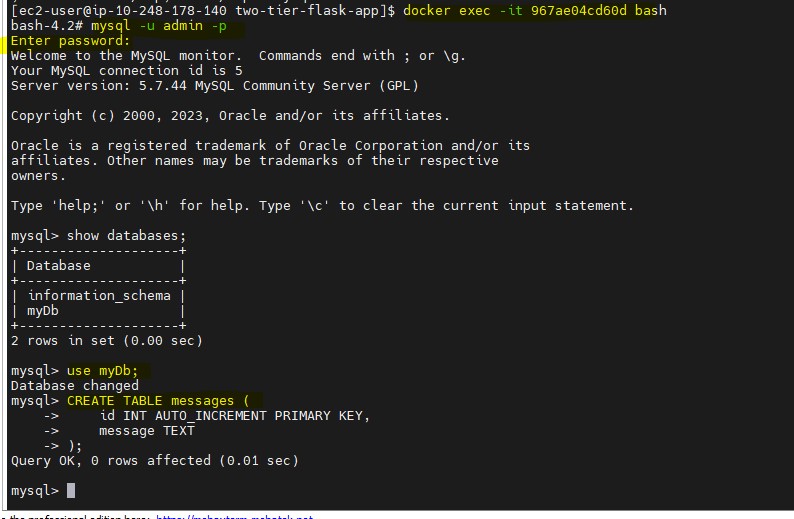
- After Creating the table access your 2-Tier Flask Deployment App on your browser: with the help of the following syntax:
http://<ec2-instance-public/private-ip>:5001
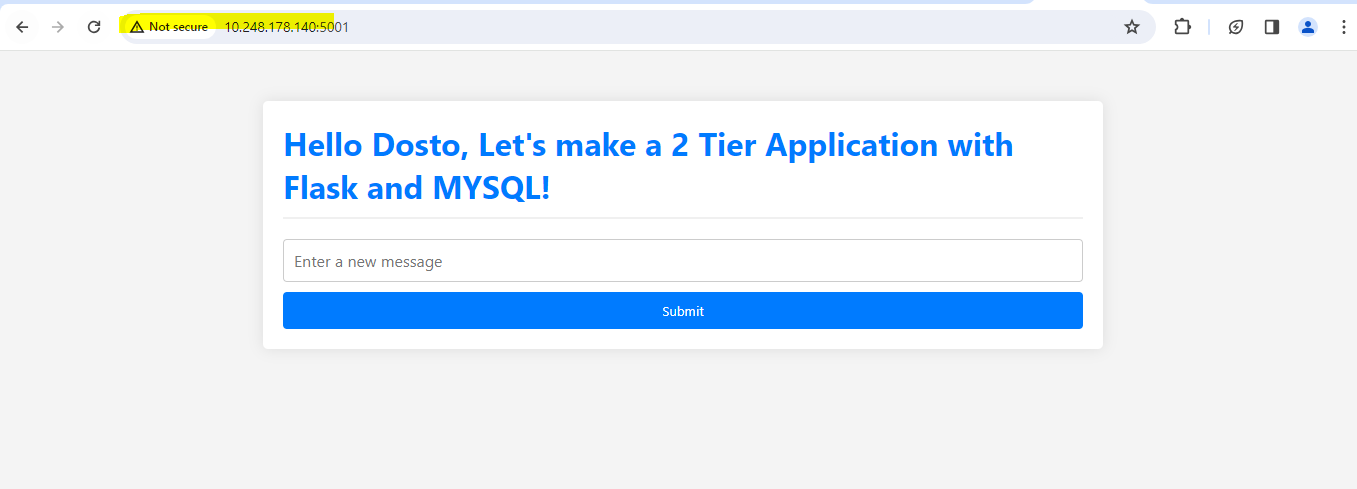
Input some messages and submit.
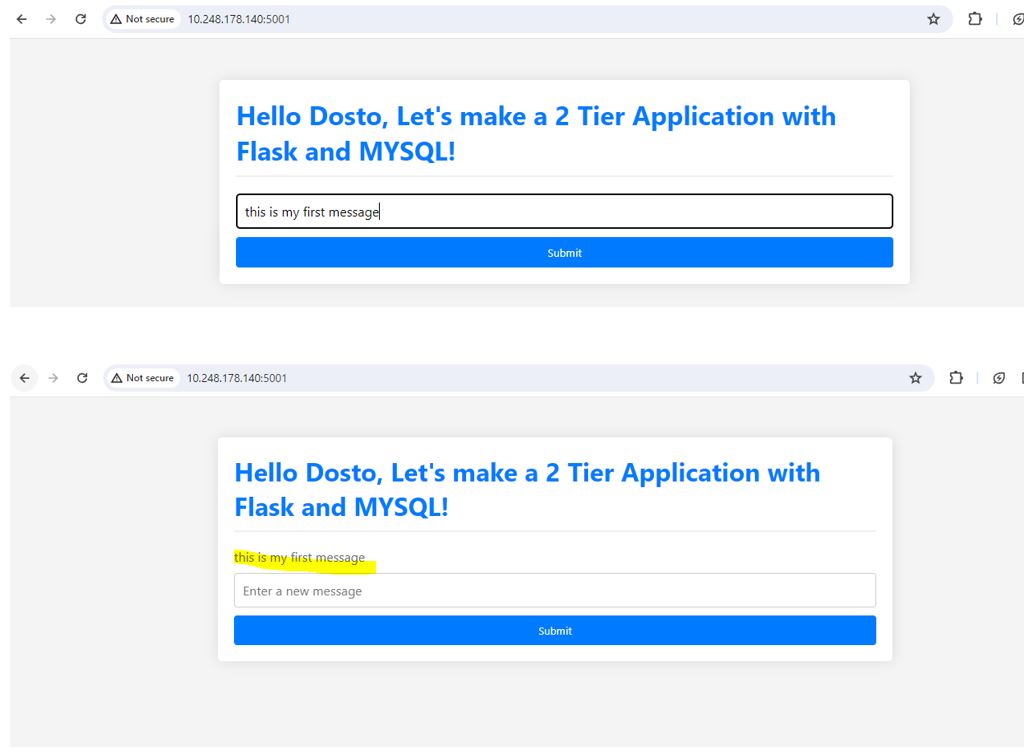
Verify that data in the database
Step 8: Push Your Docker Image To DockerHub
  docker login
  Username: <dockerhub_username>
  Password: <dockerhub_password>
Now tag your docker image with your dockerhub username.
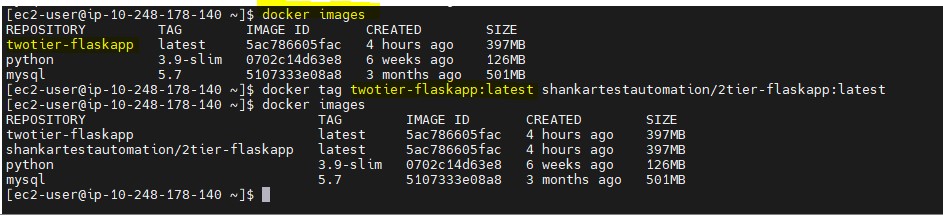
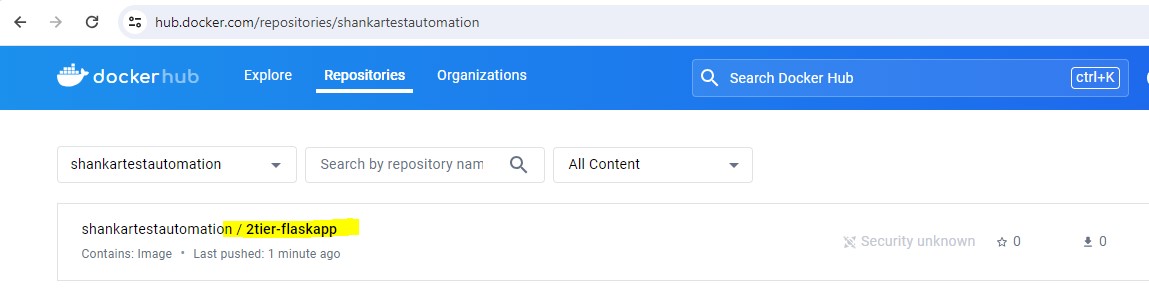
Then Push your tagged docker image to your docker hub account.
docker push shankartestautomation/2tier-flaskapp:latest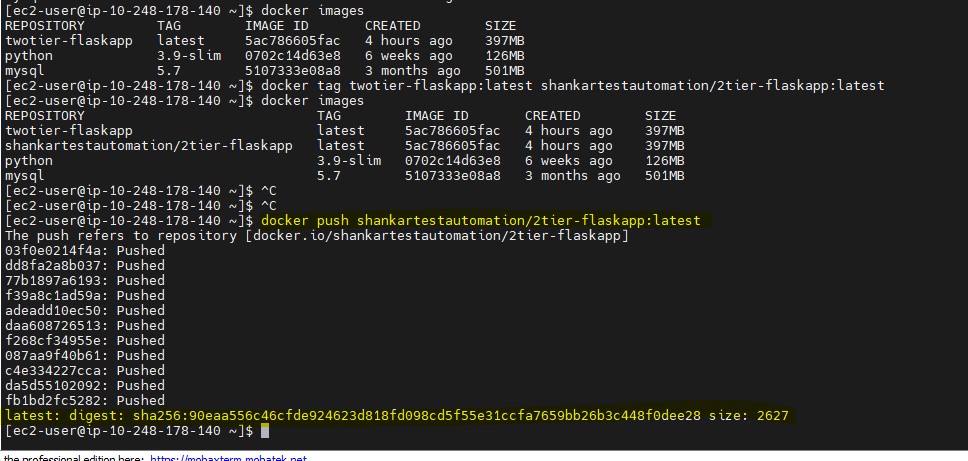
Step 9 : Lets try to use Docker-compose to deploy the application.
Benefits of docker-compose :
Docker has made it easier to set up a local development environment. However, if you want to create more than one container for your application, you have to create several Docker files. This adds on the load of maintaining them and is also quite time-consuming.
Docker Compose solves this problem by allowing you to use a YAML file to operate multi-container applications at once. You can set the desired amount of containers counts, their builds, and storage designs, and then with a single set of commands you can build, run and configure all the containers.
In short :
Docker manages single containers
Docker Compose manages multiple container applications.
1: First Install docker-compose
To install Docker-Compose, use the following commands:
sudo curl -L "https://github.com/docker/compose/releases/latest/download/docker-compose-$(uname -s)-$(uname -m)" -o /usr/local/bin/docker-composeNext, set the permissions:
sudo chmod +x /usr/local/bin/docker-composeVerify the installation:
docker-compose --version
2: Write docker-compose.yml
  version: '3'
  services:

    backend:
      image: shankartestautomation/2tier-flaskapp:latest
      ports:
        - "5000:5000"
      environment:
        MYSQL_HOST: two-tier-flask-app-mysql-1
        MYSQL_USER: admin
        MYSQL_PASSWORD: admin
        MYSQL_DB: myDb
      depends_on:
        - mysql

    mysql:
      image: mysql:5.7
      ports:
        - "3306:3306"
      environment:
        MYSQL_ROOT_PASSWORD: admin
        MYSQL_DATABASE: myDb
        MYSQL_USER: admin
        MYSQL_PASSWORD: admin
      volumes:
        - ./message.sql:/docker-entrypoint-initdb.d/message.sql   # Mount sql script into container's /docker-entrypoint-initdb.d directory to get table automatically created
        - mysql-data:/var/lib/mysql  # Mount the volume for MySQL data storage

  volumes:
    mysql-data: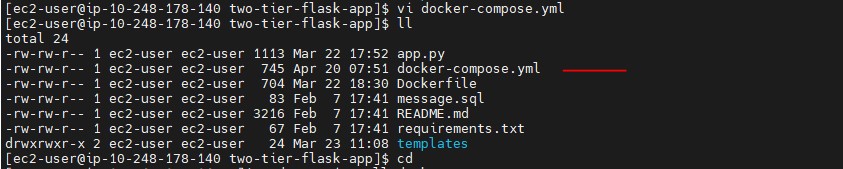
3: Run Below single command to create front-end and backend container together.
docker-compose up -d
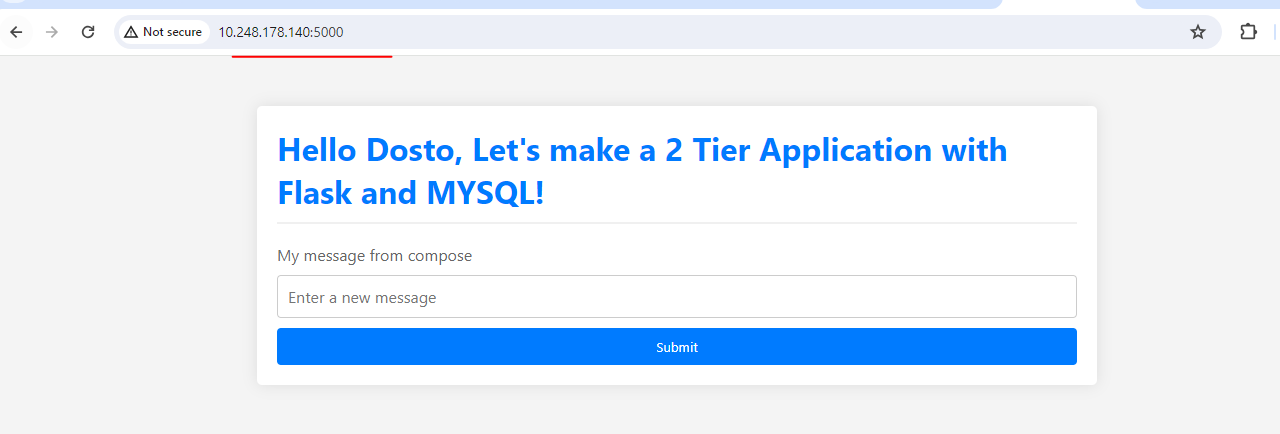
4: Access the applications
5 : Cleanup with single command
To stop and remove the Docker containers, use the following command:
docker-compose down
below are other commands which you can use for cleanup.
  # Stop a docker container
  docker container stop [container id]

  #Remove the stopped containers
  docker system prune
Conclusion:
Congratulations, we have successfully deploy a two-tier Flask application using docker and docker-compose. This containerized system ensures portability, scalability, and easy management for modern application deployments.
Feel free to explore, modify, and share your experiences with others in community.
Happy Reading!


